Sunday, October 13, 2013

Browned Butter Butterscotch Brownies

Do you need a delicious, easy, relatively quick go-to dessert?  These bars are it.  They are bar cookies, but my little one calls them butterscotch brownies.  Whatever you decide to call them, they are pretty amazing!  Bonus?  They are easy enough to mix by hand so I don't need to pull out my kitchen aid mixer.

I first found this recipe in a novel.  They are called Butterscotch Bonanza Bars.  I like to read mystery series, especially ones with cooking themes.  The Hannah Swensen series by Joanne Fluke is a bit fluffy for my usual reading taste, but the recipes are amazing.

I only made one change to the author's recipe, but I think it makes a big difference.  Instead of simply melting the butter, as originally called for, I brown it.  You know I am a little obsessed with brown butter, but using it in this recipe is a match made in heaven.
the mixed butter and sugar

Ingredients
½ cup salted butter
2 cups light brown sugar
2 teaspoons baking powder
1 teaspoon salt
1 teaspoon vanilla
2 eggs, beaten
1½ cups flour
1 cup chopped nuts (optional)

2 cups butterscotch chips or flavor of choice (you can even mix flavors)

Directions
                   
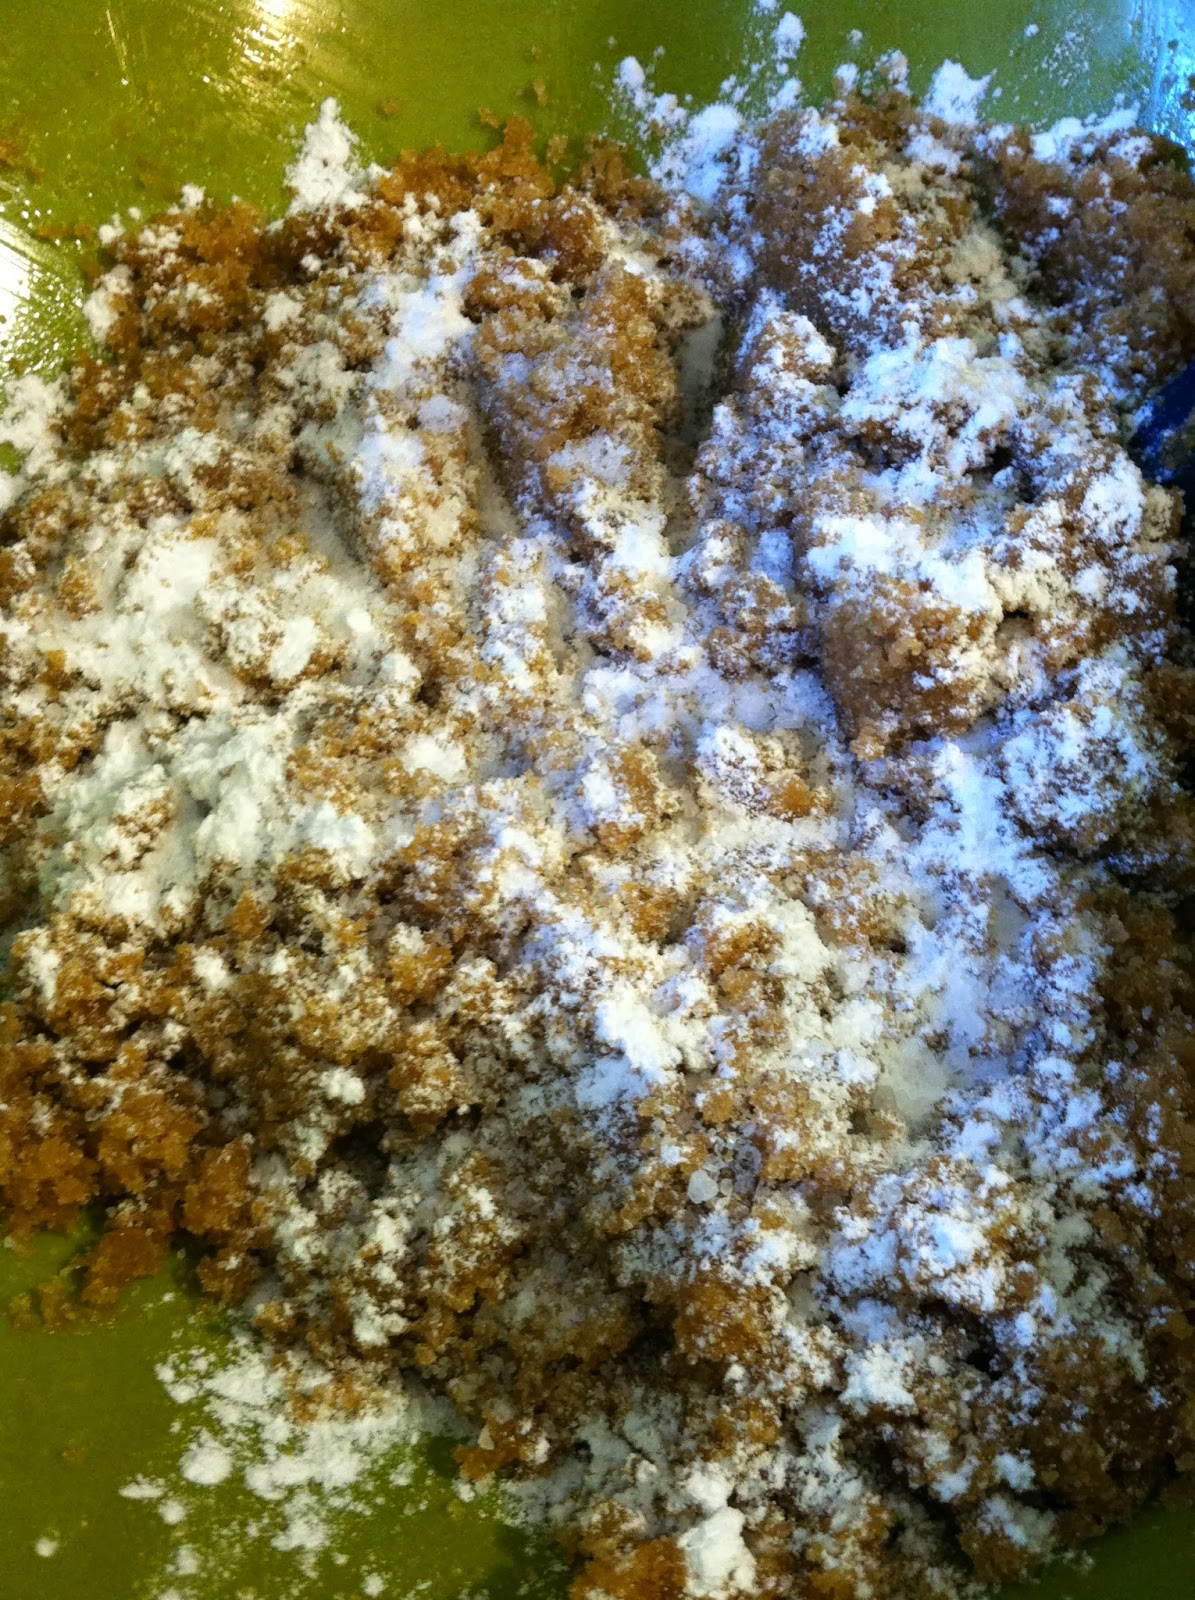
                        I sprinkle the baking soda
                             and salt all over.
                  Then mix.
Preheat oven to 350.  Butter and flour a 9x13 pan. Brown the butter.    Add brown sugar and stir well. Mix in baking powder and salt; stir in vanilla and eggs. Add flour by ½ cup increments, stirring in each half cup before adding the next. Stir in nuts and chips.
Spoon batter into the and smooth it out. Bake at 350 for 20-25 minutes. Cool completely before cutting. 

Helpful hints
  • If you have dark brown sugar, mix 1 cup dark brown sugar and 1 cup white sugar. You can make brown sugar by mixing molasses into white sugar until it’s the right color.  I have done both of these and have everything come out great.  
  • If you are too nervous about the brown butter bit, you still need to melt the butter.  That is part of the beauty of this recipe.  You are already melting the butter.  Just take it to that next level.  I promise, you can do this.  I found that using a pan, not a pot, speeds the process.  It won't take nearly as long as when browning 2 sticks of butter for cookies.  It's still worth it for the cookies, by the way.
  • Feel free to get creative with the chip/nut combos.  I have made these with no chips or nuts; chips only; nuts only; butterscotch only; chocolate only.  And I rarely use 2 cups of chips.  I kind of eyeball it.  Or see what I have left in the pantry.  
  • You really do need to let these cool completely.  
  • The pan I like to use is a tad smaller than a 9x13.  I need to cook these for about 30-35 minutes.  The edges get incredibly and deliciously crispy.  If I think they are going to get burned, I turn down the oven to 325. 
I had a handful each of butterscotch and mini chocolate chips.
Ta Da!  And yes, those crispy edges taste even better in real life.  


Thursday, October 10, 2013

new posts coming soon!

gasp!  I am writing here?  Yes, yes I am.  It is coming into the cooler weather, or cooking and baking season in my house.  Recipes and pictures will come soon.  For now I will tantalize you with the thought of Brown Butter Butterscotch Bars.  I altered a favorite recipe of mine and wow.  Let's just say that I cut them and divvied them into bags to share with colleagues, etc. so that I could not eat them all. I even did that before I took pictures.  That just means I need to make them again.  Plus, I usually add nuts and I made these nut-free so I could take them to school with me.

See you soon friends!

Sunday, July 28, 2013

Come check me out...

...over at the Camp Riverbend page.  I have been posting this summer's recipes there.  If I have energy and time I will post them here, too.


Sunday, March 17, 2013

Corned Beef and Cabbage, Slow Cooker Style

My first foray into cooking corned beef was terrible.  It both looked and tasted what I imagine an old piece of shoe leather tasted like.  I think I overcooked it by about, well, 2 hours.  Maybe more.  I went back to letting other people, who knew who to cook corned beef, do so for the next couple years.  Last year I made corned beef again, traditional style on the stove.  It came out great and was delicious!

This year I decided to go the slow cooker route, because, let's face it, the slow cooker makes my life easier.  I looked up a bunch of recipes and most of them called for a bottle of beer, which I didn't have. I found Martha Stewart's recipe and decided to use that one.  I modified it a bit out of necessity.  I was out of thyme, both fresh and dry, as well as celery.


Slow Cooker Corned Beef
Small bag of carrots, peeled and cut into 3
Several small red potatoes, washed and quartered
1small onion, cut into 6 wedges, root intact (so the pieces don't fall apart)
Head of cabbage, outside leaves removed, cut into wedges
beef brisket with pickling spice packet
I added a nice big bay leaf

Add the vegetables, except for the cabbage, and then put the corned beef in, fat side up.  Sprinkle the spices on top.  Add water, almost to the top of the beef.  
Cook on high for 4 hours.  After the 4 hours, skim the top.  I had to remove the veggies in order to make room for the cabbage.  I put them all in a bowl with a few cups of the liquid.  Add the cabbage and submerge in the liquid.  Cook for another 45 -60 minutes.  Remove the beef and let it sit for 15 minutes.

I trimmed all the visible fat off  and then sliced as thinly as possible, against the grain.  
I served it with all the vegetables, rye bread, and mustard.  
hmm...I am having trouble rotating this picture.

As you see in the picture above, I also had Irish Soda Bread.  I made that with Lilly this afternoon, using a friend's recipe.  It was delicious!


Tuesday, February 12, 2013

Meatless Meals

I know a lot of people have been posting vegan and vegetarian recipes recently.  I am neither, though I did eat mostly vegetarian for a long time many years ago.  Unfortunately, I just like steak.  So I started eating it again and have not looked back.

I do try to eat meatless a few meals a week, though.  There is a great lentil recipe I got from someone that is so delicious it seems like it shouldn't be as good for you as it is.  My fave meatless meals generally revolve around eggs: homemade french toast, cheesy eggs, or quiche.  This past Monday I threw together a yummy broccoli cheddar quiche and served it alongside a mixed greens salad with a nice balsamic dressing.

What are some of your favorite meatless meals?  Comment below if you are interested in the recipe and I will add it.


Sunday, January 27, 2013

Home made play dough


As you might remember, I worked at a summer camp teaching cooking.  Today I went back to work during an open house event and I made play dough with the potential campers.  We had a lot of fun and they were able to take home a little bit of dough, too!  It reminded me of this blog post I wrote in my other blog in October 2011.  Enjoy!


Today promised to be a rainy day so our plans to meet our friends at the park had to be modified.  My friend Colleen and I decided to bring the kids to the diner for an early lunch.  You might be thinking that we are crazy, and when I saw the line at the diner door I truly believed we were.  Luckily I was able to get in rather quickly and the owner of the Parkwood Diner sat us in the very back.  Smart man.

One of my tried and true techniques for keeping Lilly occupied when we are at a restaurant is to bring playdoh for us to use.  I realized about an hour before our meeting time that we were fresh out of playdoh.    This is when being a preschool teacher has its advantages.  I pulled up my recipe for playdough and in about 15 minutes from start to finish we had enough playdough for three kids.

Here is the recipe I used.  I will put my notes in italics.


Ingredients
2 cups flour
2 cups warm water (I used pretty hot water.)
1 cup salt (I think I used a little too much salt because it was a bit more gritty than usual.  Lilly was helping measure so it was not exact.)
2 TBSP vegetable oil
1 TBSP cream of tartar
food coloring  (I only had gel food coloring and it was hard to work into the dough.  The liquid is best.)
flavor extracts (I didn't have any so I didn't use any!) 

Mix all the ingredients in a medium pot and stir over low heat.  (I had mine a bit high because I forgot and didn't have the instructions in front of me.  It still came out okay.)  Keep cooking and stirring until it pulls away from the pot and starts to look and feel like playdough.  Put it onto a clean surface (I used my silpat.) and when it is cool enough knead the dough until it is smooth.  I divided the dough into four and made a little divet in each pile before adding food coloring.  If you are worried about staining your hands then use gloves or even wrap it in plastic wrap and knead it in there.  (With my students I used to put it in a ziplock, take the air out and let them squish away.)  

Store in airtight containers or ziplock bags.

This is a very forgiving recipe.  If it is too sticky, cook it longer.  If it starts to dry out, add a few drops of water and work it in.  If it's too wet, cook it a little bit.  I let Lilly help me and she was as thrilled to help me make the playdough as she was to play with it.  And just think of all the math and science your little ones will be learning without even realizing it!

Sunday, January 20, 2013

Sloppy joes...not just an Adam Sandler song

Did I just date myself by using such an old Adam Sandler reference?  I saw him live, at Radio City Music Hall back, oh, about 18 years ago.  He was all the rage then and I loved him!


But I digress.  The concept of a Manwich-type sloppy joe always made me feel a little nauseous.  I think it's similar to my Other People's Meatballs situation I referenced before.  I just get picky about meat.  My friend, who works at William-Sonoma, made sloppy joes when I visited her this summer.  She used the William-Sonoma sauce which was ridiculously tasty.  But it is just a tad too pricey for my budget.

One day, however, I was just in the mood for a sloppy joe.  I went to the Food Network site to see what they had to say about them, and found many recipes.  I took a few recipes and melded them together, tasting and adjusting the spices as I went along.  I made it a second time, really fine tuning what worked for me and my particular taste.  Many recipes include bell pepper, sometimes I add it, sometimes I do not.  Feel free to add it, if you like.  It is a quick recipe, good for a work night.  Toast your roll in the oven for a few minutes, then pile the meat on top. Serve a nice mixed green salad with a crisp vinaigrette alongside it.  Voila!  Dinner is served! You could even serve it over brown rice if you are GF.  

Mellie's Sloppy Joes

Olive oil for browning the meat and onions(1-2 TBSP)
1 pound ground beef or turkey
1/4 cup packed brown sugar
2 teaspoons steak seasoning (I happened to have McCormick's Montreal Steak seasoning.)
1 medium onion, chopped small
1 1/2 TBSP red wine vinegar
1 1/2 TBSP worcestershire sauce
1 tsp chili powder (feel free to omit if you don't want the little kick)
1 tsp dry mustard
2 cups tomato sauce (the kind in the can, not jarred)
2 TBSP tomato paste (if it was frozen like mine usually is, then you can add earlier in the cooking to help it defrost.)
crusty rolls for serving

Deliciousness.  One of the keys is breaking
up the meat into tiny bits.


Heat a large pan over medium high heat.  Add oil and then meat , spreading the meat around and starting to break it up.  Add the steak seasoning while the meat is browning.  When it is no longer pink, drain the oil off then return to the large pan.  Meanwhile, saute the onions in a small pan until tender and translucent. Add the brown sugar and onions to the browned meat, mixing it in.  Reduce heat to medium and add vinegar, worcestershire, chili powder, and dry mustard.  Cook for 5 minutes.  Add tomato sauce and paste, stirring to make sure all the ingredients are well combined.  Simmer on low for 10 minutes.  The meat is already cooked through, but the flavors need a chance to come together.
I like to toast my roll in the oven for 2-3 minutes.  It helps prevent roll sogginess.  Add a large spoonful of the mixture to the roll and enjoy!


Amazing slow cooker chicken part 2

I used some leftover chicken to make chicken nachos. 

As I was writing about the amazing slow cooker chicken I made today, I realized that, though I had meant to post my other amazing slow cooker chicken recipe ages ago, I never had.  I love this recipe.  I make it all the time.  It makes tons of chicken, which is easily freezable, and then reheated again.  It is very versatile and can be used in all different ways.  We generally use it for chicken tacos the first day and then over rice when we reheat it.  I have made nachos, like the picture above, and also enchiladas.  The last time I made it I was thinking of making a chicken soup with it, but we ate it all before I could!

I got the original recipe from my friend Caroline who got it from allrecipe.com.  It was so delicious that I needed to make it almost immediately.  Over the past few years I have fine-tuned and altered the recipe a bit, as I tend to do.

Slow Cooker Garlicky Lime Chicken

1pound of chicken I have used thighs and/or breasts
1/4 cup red wine vinegar
1 lime, zested and juiced
2 teaspoon white sugar though you can substitute agave or honey for the sweetness
1 teaspoon salt
1 teaspoon ground black pepper
1-2 onions, I half and then quarter the halves, but you can slice them thinly if you want.
3 green onions, sliced I have done without, too, if I was out of them.
2-4 cloves garlic, I just smash them a bit
1 Tablespoon dried oregano 

Put all those ingredients in the slow cooker, laying the onions so that the chicken can rest on top.  Put the chicken right on top.   Set the slow cooker to low and cook for 6 hours.  Shred with 2 forks when it's done and use it however you wish!  Freeze any extra in freezer bags and re-heat in a little broth or water.

The shredded chicken.  You can see the onions and how caramelized they are.


Saturday, January 19, 2013

Amazing slow cooker chicken

The perfect bite - chicken and tomato together.
This morning I was trying to think about what to to with this chicken I bought on Thursday.  I got a really great deal on chicken breasts, but, as tends to happen with these deals, they were huge and it was a 3-pound package.  So, what to do?  What I usually do is make a garlicky lime chicken for use in chicken tacos or over rice.  I thought I had blogged that recipe but I haven't yet, so that might be Amazing slow cooker chicken part 2.  And so it is, since I have now added it.  

I had some canned tomatoes, onions, garlic, and spices.  I googled slow cooker chicken and canned tomatoes and found this recipe.  I altered the recipe a bit, based on what I had in my pantry.   This is the recipe I came up with, with my ideas for the next time in italics.  

Balsamic and Tomato Slow Cooker Chicken
Serves 4 to 6
-2-3 pounds of chicken.  I used boneless chicken breast, the very thick kind.
-Salt and pepper to taste
-1 onion, very thinly sliced If you really like onion use 1 large or 2 small.
-4 whole cloves garlic, peeled Again, add more or less depending on how much you love garlic.
-1/3 cup balsamic vinegar
-1 small can diced tomatoes 
-1 large can crushed tomatoes with oregano and basil
Next time I would do the opposite because we loved the chunkiness of the tomatoes - 1 large can diced and 1 small can crushed.  I also would use stewed if I had them.
-1/2 teaspoon dried thyme
-1 teaspoon dried basil
You can see the chicken just under
the surface but not all the way on the bottom.
-1 teaspoon dried oregano
-1/2 teaspoon dried rosemary
1.  Season the chicken with salt and pepper on both sides.
2. Put onion, garlic, balsamic vinegar, tomatoes, rosemary, thyme, basil, and oregano into the slow cooker.
3. Place the chicken in the sauce.  I did not push it all the way in, just under the surface.  Whatever sauce was on top formed a delicious topping as it cooked down.
4. Put the slow cooker on for 6-8 hours on low.  There is enough liquid with the crushed tomatoes that the chicken was not even close to drying out.  
5.  I served it over brown rice.  But you could over pasta.  We also put some on the crusty Italian bread we were eating with dinner.  Oh my..delish!  
Notice how the tomatoes cooked
down to form a nice glaze on top.
I happen to love Hunt's tomato products and they have tons of flavor choices for their diced tomatoes.  You could really change the flavor profile depending on what kind you use.  
I had also steamed some carrots to have as our veggie and Vinnie and I threw them in the same bowl as the rice and chicken.  They were very tasty mixed in.  It made me start to think about what other variations I could do.  I might add peeled, diced potatoes and carrots to make it more like a chicken stew.  If you added peppers it would be more like a cacciatore.   You could also shred it with forks when it is done, like I do with the garlicky lime chicken.  If you added more mexican seasoning and some poblano or jalapeno peppers depending on your heat preference, to it, it would be the perfect chicken and sauce for enchiladas.  
There are so many slow cooker recipes that involve browning something first, and I just can't handle that at 6:30am on a workday.  This will definitely go into the rotation of recipes because it was the easiest thing in this world  and according to Vinnie, tasted out of this world.